 Rawlins Paints Blog Industrial Paint Tips, Guidelines & DIY Articles
“They say there’s treasure in that cellar – mouldy and damp, but treasure all the same!”
Many city centre based shops operate with their store room in the basement, and with little scope for major renovation work, they must work with what’s to hand, or available at Rawlins Paints. So, in this featured post we’ll look at waterproofing basements, cellars and shop stockrooms. Let’s remove the risk of unsightly stains, damp, mildew, condensation and mould problems, and create a room fit for a king, or one that could be turned into an office.
“Will these tips and tools be applicable for my house’s basement?” – we hear you say.
Yes! This post will combine multi-roomed cellars, open planned basements, storage rooms packed full of boxes, suitcases, bin-bags, and even white goods – should you be using your basement as a laundry room.
Once the damp, cold and leaky walls are out, you can move whatever you’d like into your new ‘favourite room’. So, let’s look at the best paints and products for the job, along with tips, recommendations and inspiration when waterproofing a basement.
Quick Links – click to go straight to a section of this page
- Overview
- What Needs Protecting in Your Basement?
- Office Space
- Shop or Restaurant Storeroom
- The House Basement
- Utility Room
- First Steps in Waterproofing a Cellar Room
- How to Check for Damp
- Sealing the Walls: Internally vs Externally – A Quick Test
- What is Runoff and How Does It Cause Damp Conditions?
- What Causes Condensation?
- What is Groundwater Swelling?
- Waterproofing a Basement from the Inside
- How to Dry out a Basement
- How to Deal with Mould on the Walls, Ceiling and Floor
- Damp Proof Floor Coatings
- Repairing Cracks in the Basement Concrete Floor
- Walls (Internal)
- Brick Walls:
- Concrete Walls:
- Walls (External)
- Main Action Points
Overview
Waterproofing basement walls and floors, and where to start, is the dilemma for many people searching online for ‘cures’ for a damp and dingy ‘bunker’.
Is the problem internal or external?
Should I only tackle it from the inside, or if I resolve drainage problems outside and around the property, will the mould and algae clear itself up? Without seeing and assessing the damage, it’s a hard diagnosis to make – but there are several key actions that will improve the situation. Some involve internal work, some external.
Cost: Is it easy to cheaply waterproof a basement from the inside?
It can be, yes. But a deeper seated problem shouldn’t be ignored.
Once there’s a diagnosis, there’s a solution, and this post will help you make that diagnosis.
Top Tip: Start by assessing if there is moisture coming from the outside (including up from the floor) or from high humidity, internally, that is condensing and causing moisture on the walls and ceiling (more on how to do this coming up).
If, within half an hour of medium to heavy rain, water is coming in through the walls, then you may have a drainage problem from broken/faulty gutters, leaders and grading. The rain may be flowing straight down the walls and into the basement.
Water that leaks through into the basement hours (up until half a day on average) later could show that it’s the water table rising, causing hydrostatic pressure to push water into the basement, through walls and the concrete flooring. This could mean that some bigger excavation work is needed outside the foundation walls, to seal and most effectively waterproof the basement.
Let’s look inside the basement now though and see what preventative measures can be actioned there.
What Needs Protecting in Your Basement?
“Johnny’s in the basement, mixing up the medicine.”
Waterproofing a basement has benefits to your health, the value of the property (your home or business), and can lead to some successful basement conversions – into living quarters for example. It can be relatively inexpensive to do if the conditions are right and what was once a dank, dark corner of the home could be a light-filled, hub of entertainment. For businesses and shops, that extra storage space could prove invaluable to company growth, profit and keeping more stock on-site and less in external storage.
Here’s a quick checklist of property uses and basement contents we’ll be looking to protect with this ‘waterproofing basements’ post – note that multi-room basements could have numerous smaller rooms utilising several examples below, and if they don’t, once they’re ‘fixed up’, they probably will do:
Office Space
- Filing cabinets
- Storage boxes containing files – both paper, cardboard and plastic materials
- Boxed electrical goods – computers, laptops, phones, printers and scanners, etc.
- Cleaning equipment – mops, buckets, general cleaning contractors’ goods
- Promotional materials – flyers, magazines, catalogues, posters and campaign material
- Partitioned walls
Shop or Restaurant Storeroom
- Stock storage
- Promotional materials
- Seasonal fittings
- Cold-food storage
- Basic food preparation
- Sink, dishwasher and other cleaning goods
- Large wine cellar – stock and racks
- Computers and stock keeping electrical equipment, desks, filing cabinets, etc.
- Cloakroom
- A safe and locked up sensitive materials
- First aid kit, canteen or communal space
- Bar area or a nightclub hotspot
The House Basement
- Extended, or even the main kitchen, with white goods and an oven
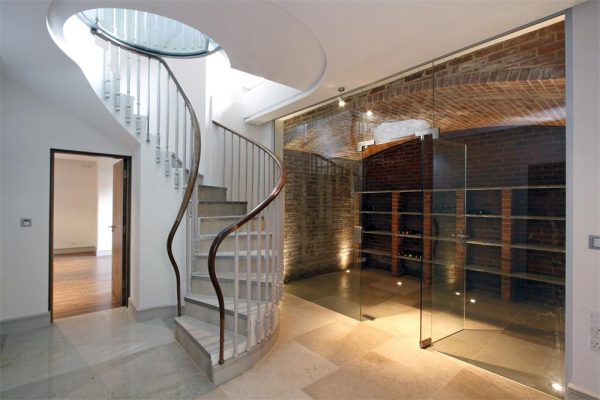
- A wine cellar
- Laundry room – washing machine, tumble dryer, clothes hangers
- Downstairs toilet, shower and/or fully installed bathroom
- Spare bedroom
- Office
- Playroom
- Walk in wardrobe
- Storage – boxes, bags, cases, trunks, etc.
- Study room
- Snooker, or games room
- Recording studio

Utility Room
- Coats, boots, shoes, etc.
- Wash facilities – sink
- Christmas tree and decoration storage
- Secret hiding place of Christmas presents
- Tool kit, candles, lightbulbs, electric drill and other DIY equipment
- Workbench
- Pet food storage
First Steps in Waterproofing a Cellar Room
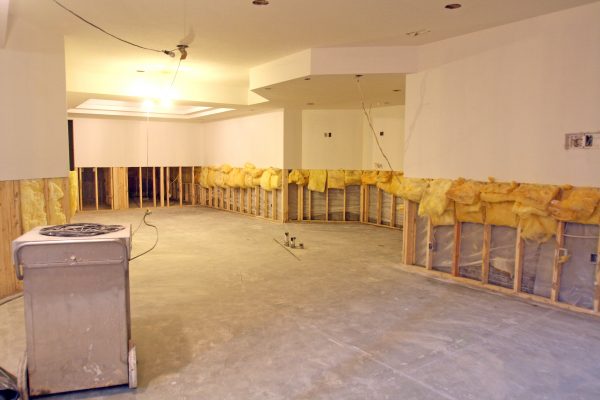
It’s best to begin by assessing the damage caused by untreated damp, mould and algae. Ensure that the walls and ceilings are in good enough condition to be cleaned and painted. Look for any crumbling brickwork, soft timber, stained patches on the walls and ceiling, as well as any specific corners where the musty damp smell may be at its worst (it could be the source of the problem).
A lot of wall damage may be very visible, such as horizontal, diagonal (sometimes looking like steps) or vertical cracks. Efflorescence (a white powdery residue) may have built up around the low parts of the walls, too. Fungi, algae and dark mould patches should be easy to spot if the room is cleared out – all visual clues that work could be done quickly and easily.
An emptied-out basement allows the room/s to ‘air’ and the drying out process to begin (with the use of heaters). Try not to use any condensation creating equipment during the process (tumble driers, computers that ‘kick off heat’, kettles and toasters, etc.). Rip up and rip off any materials that may hamper the drying out period (carpeting, wallpaper, old shelving). Create as bare a shell as possible for checks, repair work and damp-proofing of the room to begin.
How to Check for Damp
Firstly, follow your nose. As ventilation in basements and cellars is generally poor, and unless there’s a de-humidifier in the room, you will immediately know if there’s a damp and mould problem as soon as you walk in, or even get near the room. That pungent, musty smell is a clear first signal that you need to move furnishings, storage boxes and containers out, and maybe even peel off wallpaper and damaged paintwork to get to the problem.
There is a difference between condensation and damp paints, and it’s a good idea to know how to tell the difference, in order to find the best products for your basement conversion/restoration. If damp has set-in to the carpets, rugs, linoleum, or floor tiles, the quickest fix may be to rip them up and start again.
“Why shouldn’t I just wash the carpets, or mop down the linoleum?”
That is a very good money saving question, and it’s an adequate short-term fix. However, short terms fixes will not help in your task of successfully waterproofing the basement.
The short answer is that you need to look for damp coming up from the concrete floor. Cleaning carpets and linoleum will not stop that damp coming back. To stop the damp coming back, the concrete slabs will need sealing (more on how to do this a bit later).
Spot Check: Tape down a piece of plastic sheeting (approx. 500x500mm) to the floor and/or wall and leave it for 24-72 hours, check daily. Try to ensure this is to a ‘bare’ section, as any paint, floor coverings, etc. will affect the results. More on judging the results in the next section!
Spot Check: If there is damp and mould growing on a wall, is the top of it externally facing? Check if there are any downpipes, drains or pooled water sources around the edge of the building (upstairs), that may ‘leak’ water down through the walls.
If possible, check for any internal plumbing in the basement which may have been closed off inside the walls. There may be leaking pipes, pools of water inside the wall cavities, or poor drainage passing through them.
For larger floor spaces, such as the basement of a large city centre based store, the Sika Tramex Moisture Meter is an excellent device for testing moisture conditions in concrete, as well as other floor slabs and screeds.
Sealing the Walls: Internally vs Externally – A Quick Test
Earlier, we looked at using a piece of plastic sheet taped to the floor/wall to determine whether damp was coming from below/outside of the floor/wall. This test can actually tell us other results:
If the side facing the substrate (floor/wall) has moisture – this shows that damp is coming from beneath the floor or through the wall, and a surface treatment to the floor/wall (internally and/or externally) will help resolve the damp problems. This damp could be from poor drainage of the soil around the building and the foundation’s walls or lack of or damaged DPM (damp proof membrane) in the floor slab.
If the side facing the room has moisture – this shows there’s excessive (high) humidity in the basement and installing or using a room dehumidifier will help resolve damp issues. Add to this a good anti-condensation paint and the problem will be improved substantially.
Top Tip: To get the most out of a wall or floor sealant, ensure all cracks and holes are filled in and correctly sealed. Use an epoxy filler for bigger gaps.
What is Runoff and How Does It Cause Damp Conditions?
At the time of writing (October), we’re moving towards the wintery months in the UK. However, in colder climates (for our international readers), this may be an issue for you already. During these cold seasons (with sleet, snow and ice), adjoining paths, patios and driveways that don’t slope away from the building’s walls can cause hydrostatic pressure – from the cold-water build-up that forces itself down through the walls. This runoff of rain and other salt waters can manifest itself in mould and algae on the internal walls.
All adjoining ground to a building should slope down and away from it, to allow for damaging salt waters to ‘flow away’. If yours do not, then you may need to look at more structural work to dry out and allow for waterproofing of the basement.
What Causes Condensation?
For lived in spaces, condensation can be caused by body heat – including breath – where the warm and moist air hits the cold wall, creating ‘moisture’. Moisture that cannot dry through ventilation or sunlight, sufficient heating or from a dehumidifier, will fester and create stagnant water on the walls. This can turn into mould or algae, or it could simply stay as odorous and unsightly moisture and condensation.
Once the basement has been cleaned, using a high quality anti-condensation paint can protect the walls and greatly reduce the risks associated with condensation.
Homes that have white goods in the basement – from fridges and freezers to washing machines and tumble driers, will be a haven for moisture and condensation to remain coated on the cold walls. Even an electric, or portable radiator cannot sufficiently tackle the condensation, as it can’t be on 24/7/365, keeping the room at a consistent temperature or humidity.
What is Groundwater Swelling?
An example of where groundwater swelling recently had a big impact in the UK, was the York floods. In the US, there are many mega storms that also cause floods, and across the world, wherever the ground is unable to hold the extra water from storms and flooding – it cannot sufficiently drain the water to the nearest plains – groundwater swelling can occur.
When the water-table has passed it’s high-point, the runoff from the water will be into adjoining buildings. If your home or business building is not constructed with protection against high groundwater, the dry out process could take months.
A building’s foundations can be severely damaged by groundwater swelling, insufficient drainage around the property, broken downpipes, guttering and badly maintained drains.
Waterproofing a Basement from the Inside
How to Dry out a Basement
The drying out process is not an overnight thing, as there may be a lot of moisture and water still contained within the walls. Sufficient checks need to be undertaken to ensure that water and damp is still not getting in whilst the room is being dried out.
Clean down surfaces and if needed, towel dry them. Install some portable heaters and try to keep the room at an even temperature and humidity whilst the walls, ceiling and floor dry out. You may need to hire professional driers for this, as it can be a long process if the basement has been affected by local flooding, or if you’re doing the work during late autumn, winter and early spring, when the weather is cold and it rains a lot!
Be patient, as re-plastering damaged walls, applying sealants, anti-damp paints, etc. when the walls haven’t dried out sufficiently may mean you will need to strip it all off and start again.
How to Deal with Mould on the Walls, Ceiling and Floor
Rawlins Paints stock a wide range of paints that after cleaning can help prevent mould from returning, but as discussed, underlying reasoning for the mould should be investigated.
Preparation, as ever, is key. Doing a thorough job cleaning down walls, removing old wallpaper and peeling paint is a necessity before a lot of paint and wall sealants can be applied. Setting up heating in the basement can begin the ‘drying out process’ though in the meantime.
Look at this task as a fresh start for the basement – an out with the old and in with the new project.
Cleaning products:
Zinsser DIF Concentrate Wallpaper Stripper will quickly break down old paste, making for a fast and economically priced first task. Don’t forget to score the wallpaper first, for the stripper to soak in.
Blackfriar have an excellent paint and varnish remover, for any damaged areas caused by damp, mould and subsequent peeling.
Zinsser Universal Degreaser & Cleaner coupled with Zinsser Mould Killer & Remover makes an excellent cleaning team for surfaces with stubborn mould staining prior to painting.
Rust-Oleum Epoxyshield Cleaner / Degreaser is ideal for general cleaning of floor surfaces prior to applying a coating.
Wall primers:
Browse through our wall and ceiling primers, as some may best suit a specific topcoat – some can even remove the need for surface sanding and extended preparation.
Wall and ceiling paints:
Shop from a range of mould and damp proofing paints, once any repair work has been done on the walls. For areas that will be used for food preparation, such as a kitchen – at home or within the workplace – or even a simple unit with a kettle, toaster and microwave, they may benefit from using a hygienic coating on top of a waterproofing wall sealant, that is easy to wash down and maintain.
Of course, with older buildings, the walls may be very badly stained – so a stain blocking paint would be required to cover the past and look to the future.
Floor paints:
Dependant on requirements and if your moisture tests reveal no issues with the floor, a medium use floor paint would mostly suffice a basement floor after it has been sealed – like coatings used in garages and workshops, where there’s only pedestrian ‘traffic’. It would withstand scrapes and scratches from furniture, storage boxes, shelving and filing cabinets, too.
An epoxy-floor-paint is the best product for sealing and waterproofing the floor. These two pack products are more complicated to apply, so if you are unsure about application methods and mixing times, please refer to the product datasheet and/or contact us at Rawlins Paints. Ideal for shops, stock storage, basement workshops and wine cellars, and even food preparation areas (kitchens or canteens), pick an epoxy floor paint to get the job done correctly, adding a durable and longer lifespan to the floor.
For a more textured and anti-slip coating, Rawlins Paints stock some of the UK’s leading non-slip floor paints, also ideal for commercial and domestic use.
Our favourite systems for floors and internal basement/cellar walls;
Assuming you have carried out all your checks and preparations above, now comes the ‘fix’. We’ve listed our most popular systems below to apply to your floor and walls to turn your basement in to the dry, functional space you want it to be.

Damp Proof Floor Coatings
A correctly applied damp proof floor coating can provide a very cost effective way of re-instating a damp proof membrane to the floor without major structural works. If your moisture test (discussed earlier in the post) has shown signs of moisture coming up from the floor then this will improve the basement floor’s appearance, waterproofing and longevity, with an improved performance in a commercial property. Some manufacturers’ application methods vary from product to product, and it is essential that datasheets are referred to for this procedure.
Things of note to check for on datasheets:
- Surface preparation – post-repair work
- The thickness of the application coating
- Coverage rate
- Room humidity
- Technique and tool recommendations
Repairing Cracks in the Basement Concrete Floor
Before applying a waterproofing and sealing floor paint, any crack, holes and surface damage on the concrete should be repaired first. If there is wider damage in the concrete slabs, such as deeper cracks or foundation damage, then it is advised to get a second opinion from a contractor/structural engineer before commencing any further repair work.
To repair cracks, using a chisel, chip the cracks into inverted V shapes, and using a wire-brush or vacuum cleaner, remove any dust and debris. The inverted V shape will keep the repair mortar in position.
All repair products will come with manufacturers’ recommendations regarding application – including level of filling, max/min thicknesses, priming (if required), etc.
The Product
402 Damp Proof Coating is a two pack epoxy resin based primer/coating, which has been developed to function as a residual construction moisture suppressant, allowing the early installation of moisture sensitive flooring and or providing a damp proof finish to concrete floors.
One or two coats may be applied depending on the degree of dampness present in the sub-floor. 402 Damp Proof Coating is available in grey, red, and clear colours to allow control of uniform coverage and a Winter Grade version of this product is available for application in low temperatures.
Features & Benefits
- Provides a surface damp-proof membrane
- Allows rapid laying of floor toppings to power floated concrete
- Solvent free, low odour
- Coloured to monitor progress
- Low viscosity, easily applied
- Excellent adhesion
- Surface tolerant
- Excellent resistance to water, grease and oil
- Can be used as a primer or finished floor coating.
Recommended Uses
- As a surface damp-proof membrane.
- As a moisture suppressant on concrete and sand/cement screeds.
- As a damp tolerant primer for concrete and resin screeds.
- As a surface and damp tolerant floor coating.
Preparation
Concrete surfaces shall be sound, clean and free from dust laitance and other contaminants. Suitable mechanical treatments such as vacuum grit blasting or diamond floor grinding are recommended to ensure the removal of contaminants and to provide a ‘key’ to ensure maximum adhesion. 402 Damp Proof Coating can also be applied to minimally prepared substrates if the above recommended methods are not achievable but long term performance will be reduced.
Moisture testing of the substrate in accordance with BS8203, shall be carried out on new concrete floors. A sub floor moisture reading of 97% R.H. can be accommodated, if readings exceed this figure, then the floor must be allowed to dry out further.
Application
- As a damp proof membrane.
- a) Two coat application (R.H>92%).
Apply a first coat of 402 Damp Proof Coating red, by brush, roller or airless spray to the prepared substrate at a nominal rate of 3m²/kg. Within 24 hours apply a second coat of 402 Damp Proof Coating grey at a nominal rate of 4m²/kg.
- b) Single coat application (R.H<92%).
Apply a coat of 402 Damp Proof Coating (grey, red, or clear) at a nominal rate of 3m²/kg
- As a primer/coating
As a coating, apply 1 or 2 coats of 402 Damp Proof Coating at a nominal rate of 3m²/kg per coat. Allow 14 hours @ 20°C prior to applying the second coat. Apply by brush, roller or airless spray.
Notes
- Do not apply to surfaces with standing water.
- Do not apply at temperatures of 3°C or less.
- Avoid contact of the material with skin and eyes, wear gloves and goggles
- Wash off splashes immediately with soap and water
- Please refer to the Technical and Material Safety Data Sheet for additional information
- For specific advice regarding any aspect of this product, please consult our Technical Department.
Walls (Internal)

The Product
Sika 1 Pre-Bagged Structural Waterproofing System mortars are pre-bagged kiln dried blends of specially graded aggregates and cements packaged in 3 grades at the appropriate mix ratios for optimum application performance and durability. When mixed with the diluted Sika 1 Waterproofer Liquid Admixture they provide a 3 coat system for the structural waterproofing of walls.
Uses
- Internal waterproofing of below ground structures to meet the requirements of BS8102 – 2009 Grades 1 – 3
- Waterproofing of swimming pools and other water retaining structures
- Waterproofing of basements, cellars and vaults
- Waterproofing of tunnels
Features and Benefits
- 90 years track record
- Type A waterproofing system according to BS8102- 2009
- Proven resistance to hydrostatic back pressure
- Fully bonded waterproofing barrier
- Can be applied to wet substrates
- For use on concrete, brick and structural blockwork
- Can be used internal and externally
- Can be applied to wall, floors and soffits
- Quality controlled system
- Used for negative or positive water pressure situations
Approvals & Standards
- Accredited by the BBA cert Number 00/3761 which states under durability “Under normal conditions of use, the systems will provide an effective barrier to the transmission of liquid water for the life of the building to which they are applied.
- WRAS Certificate 0505506
- DWI Exemption
Preparation
The substrate must be structural sound and generally brickwork, dense concrete block and concrete normally provide satisfactory substrates. All surfaces should be clean and free from surface contaminants and laitance to achieve an adequate bond.
Brick Walls:
All existing treatments shall be completely removed and the exposed surfaces roughened by mechanical or water blasting techniques, followed by washing down and brushing to ensure full removal of all loose material. Mortar joints should be bonded and sound.
Any defective mortar joint should be raked out to a depth of 12.0mm and repointed using Sika 1 Finishing Mortar made up with clean water.
Concrete Walls:
All laitance shall be removed to expose coarse aggregate by mechanical or water blasting techniques.
On new concrete walls Sika Rugasol MH Concrete Retarder can be applied to the face of the shuttering followed by wire brushing and washing of concrete surfaces.
Application
Immediately prior to application the substrate must be soaked with clean water however no standing water or puddles should be present.
First coat – Sika 1 Spritz & Bonding Coat Mortar applied as a 6mm spritz coat by casting on vigorously over the complete wall surface.
Second coat – Sika 1 Render Mortar applied by trowel at 6mm as soon as the first coat has stiffened sufficiently (typically 4-5 hours later), with a coved trowel used at internal corners. A splatter coat of Sika 1 Render Mortar or Sika 1 Spritz & Bonding Coat Mortar, mixed with plain clean water or gauging liquid, is then applied to serve as a key for the third coat.
Third coat – Sika 1 Finishing Mortar applied by trowel at 6mm, finished with a wooden float to achieve a closed surface with neat arrises.
Should additional coats be required Sika 1 Render Mortar is repeated on the second day and subsequent days before the application of the Sika 1 Finishing Mortar final mix.
System Structure
- 1st coat Sika 1 Spritz & Bonding Coat Mortar @ 6mm
- 2nd coat Sika 1 Render Mortar @ 6mm
- 3rd coat Sika 1 Finish Mortar @ 6mm
Total System Thickness – minimum 18mm
Expected Consumption
Sika 1 Waterproofer Liquid Admixture is diluted 1:10 by volume with clean water to form a gauging solution.
- 1st coat 25 kg bag Sika 1 Spritz & Bonding Coat Mortar 5.7L gauging solution
- 2nd coat 25 kg bag Sika 1 Render Mortar 3.3L gauging soultion
- 3rd coat 25 kg bag Sika 1 Finish Mortar 3.3L gauging solution
A mixed 25kg bag of Sika 1 Spritz & Bonding Coat Mortar will yield 12.5L of mortar which is sufficient to cover 2m² at 6mm thick.
A mixed 25kg bag of Sika 1 Render or Finish Mortar will yield 12.5L of mortar which is sufficient to cover 2m² at 6mm thick.
Notes
- Levelling of walls and screeds Undulating surfaces should be levelled after application of the Sika 1 Waterproofing System for optimum performance.
- Cracks leaking water should be sealed with Sika Injection systems or plugged using Sika 4a Water Stop.
- Sika 1 Waterproofing System must be kept moist during the work period and for a minimum 7 day period after final application to stop drying out and reduce cracking. They should be prevented from being exposed to sudden changes in air temperature and relative humidity.
- Fixings should be bonded onto the Sika 1 Waterproofing System or pockets created before installation.
- Timber battens can be adhered onto the Sika 1 Waterproofing System using Sikaflex 11 FC+ to facilitate the application of a dry lining system.
- Sikadur 31 CF can be used to structurally bond fixtures to the Sika 1 Waterproofing System.
- Ensure the substrate is structurally sound before installing the Sika 1 Waterproofing System.
- Use Sika Whitewall Plaster or SikaMur Finish Plaster to the wood float finished third coat of the Sika 1 Waterproofing System to provide a smooth finish suitable for decorating.
- Sikagard coatings can be applied directly to Sika 1 Waterproofing System to enhance durability and aesthetics.
- Reference should always be made to the Detailing, Architectural and Engineering Consideration Sheets, Agrement Certificates and Installation Guides.
- Puncturing the system can compromise its integrity.
- Do not expose to frost while curing.
- Allow Sika 1 Waterproofing System to sufficiently dry out before over coating.
- The structure and its elements must be capable of withstanding the developed water pressure and other anticipated loadings without cracking or delaminating.
- Never score or scratch any of the Sika® 1 coats to provide a key.
- Do not use gypsum based plaster over the Sika 1 Waterproofing System. Refer to plaster manufacturer for advice on suitability of products for use in waterproofing works.
Walls (External)
The Product
Rust-Oleum Mathys Murfill Waterproofing Coating is an elastic, crack bridging and waterproofing exterior wall coating with a microporous structure that ensures the substrate is constantly able to breathe. Ready for use on a range of surfaces, it is simple to apply on any exterior wall, this water based coating provides the highest protection and offers guaranteed waterproofing.
Features & Benefits
- 100% Waterproof – An exterior wall treated with Murfill Waterproofing Coating is guaranteed to remain bone-dry.
- 400% Elastic – The permanent elasticity protects your exterior wall optimally in all circumstances and prevents tears, flaking and blistering.
- 10 Year minimum life expectancy
- Water vapour permeable – Murfill Waterproofing Coating allows the substrate to breathe at all times.
- Crack bridging – Excellent resistance against ageing and contamination in all weather conditions and climates.
- Protects reinforced concrete against carbonisation, penetration of chlorides and corrosion.
- Colourfast – The unique Murfill formula means that even deep and dark colours are not affected by sunlight.
- Water based – Low odour, minimal VOC’s and environmentally friendly.
- Can be combined with Murfill fleece for additional mechanical reinforcement and for bridging of (active) cracks.
Preparation
Rust-Oleum Mathys Murfill Waterproofing Coating can be applied directly on old (sound) paintwork after thorough brushing down. Chalking paints or new/unpainted substrates must be treated first with Rust-Oleum Mathys Primer 44 HS or with Mathys Pegafix, when the old paint coat (acrylic paint or Murfill Waterproofing Coating) is affected by the solvents of Rust-Oleum Mathys Primer 44 HS. On smooth non-porous substrates apply a coat of Rust-Oleum Mathys Pegalink Universal Adhesion Primer or a coat of Rust-Oleum Mathys Noxyde (except for white) diluted with 25% water.
Cracks
- Cracks < 0.5mm wide: fill up with Rust-Oleum Mathys Murfill Waterproofing Coating.
- Cracks > 0.5mm wide: fill up with Rust-Oleum Mathys Elastofill or Mathys Mur-Filler.
- Active cracks must be bridged with Rust-Oleum Mathys Murfill Reinforcement Fleece.
Application
Apply to prepared substrate in two thick coats at 400gm/m²/per coat by brush, roller or airless spray. When used in combination with Rust-Oleum Mathys Murfill Reinforcement Fleece the coverage will be reduced to 1.3kg/m².
Waterproofing Basements: Main Action Points
- Make sure the ground around the walls of the property slope away at a decline of 50mm per 300mm.
- Clean the guttering and try to make the downpipe discharge rainwater away from the foundation wall.
- Remove any plants, flowers and grass – if possible – that run parallel to the wall, as their roots will allow surface water to flow down to the foundation’s walls. See if you can create a small concrete path, or gravelled area instead.
- If necessary, use external waterproofing paints on the walls, to prevent water from seasonal elements seeping through and down into the basement.
- Clean the walls and ceiling, before conducting any repair work on cracks and holes.
- Use a sealant on the walls, prior to painting them, to act as a barrier to moisture, condensation, high humidity and any recurring damp issues damaging the foundations or causing decay to brickwork and the building’s structure.
- An epoxy or urethane can be injected in to any entry points of seepage, such as cracks and pipe penetrations within poured in concrete foundations.
- Investigate (with a contractor) installing a sump (a water-controlling, not waterproofing method) – a drain-like hole in the basement floor with a pump, which discharges water from the sump away from the house, should there be a rise in the water level below the house, up and into the basement floor.
- For serious water issues, a ‘French Drain’ (also known as a perimeter drain) system of piping may benefit the property. This is a big task, and again would require professional installation.
- Try to ventilate, or create air-flow in the basement, as well as using de-humidifiers.
- Keep a big enough gap between any furniture, storage units, shelving, etc. for you to clean behind and wipe down the walls if condensation does begin to build up again.
If there’s any feedback you’d like to offer, or share some tips from your own experience of waterproofing a basement, please do let us know in the comments section!
Here’s to a dry winter!
Hello, this post is very much helpful for many people who want their basements waterproofed. This has been a problem in most households. Thanks again for the share.
We recently moved into a new area and have noticed that it rains a lot here. We do not want to have flooding problems with our basement, so we thought we would look more into waterproofing our floors. I am glad to know that waterproofing a basement has benefits to your health. I am also glad to know that the value of your property can be increased by completing this project as well. We will be making plans to start waterproofing our basement shortly, thanks.